
Connecting ServiceMinder to SendJim
Step 1: Generate an API Key in ServiceMinder
-
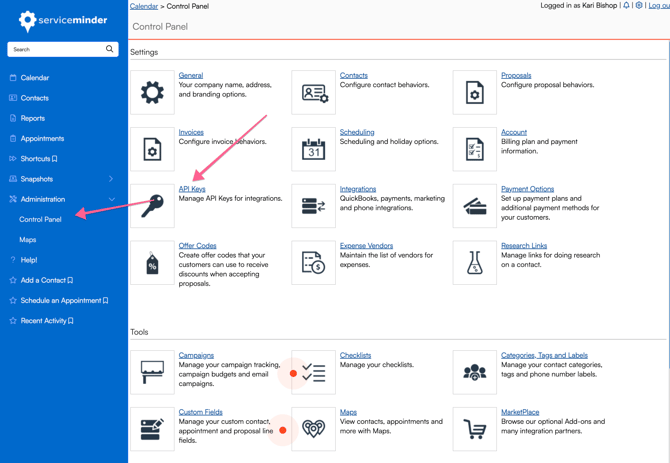
On the left menu in ServiceMinder, go to Administration > Control Panel
- Click API Keys
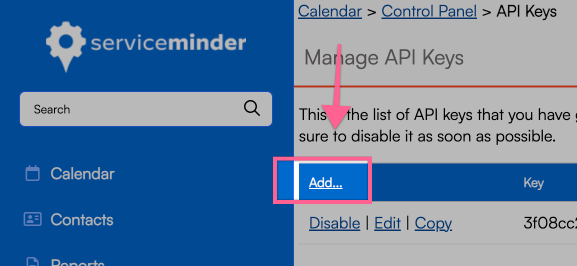
- Click "Add" in the upper left corner
- Leave the default selections, name your API Key, and click "Save"
Once saved, copy the API Key — you’ll need this in the next step.
Step 2: Set your Auto-Replenish and Max Spending Limits
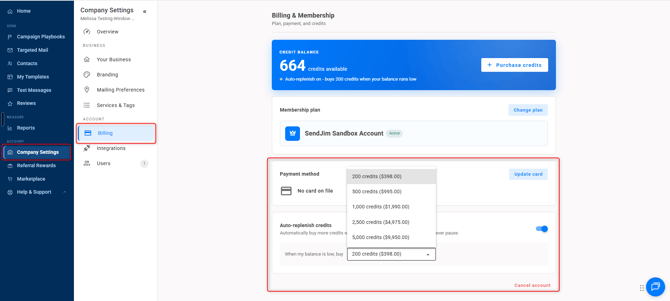
- This is the last and most important step. Navigate to your Company Settings along the left then select the Billing tab. Once in the Billing tab you'll want to turn on your Auto Replenish. There's a toggle button to turn it on easily.
- After that you'll want to go into your Integrations tab and set your Max Monthly Spending.Click "Save"
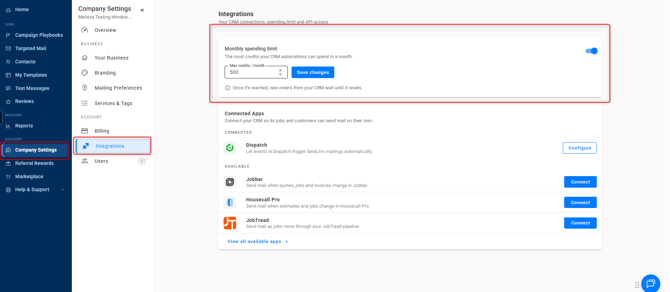
- These numbers are what SendJim will use to give your CRM a budget to spend every month. Once your CRM has reached your Max Monthly Spending limit inside of SendJim for that calendar month, SendJim will send you an email and stop any additional mailings from being triggered until the next calendar month. Or, you can choose to come in and increase your max spend to allow automation to continue.
Step 3: Connecting ServiceMinder to SendJim
-
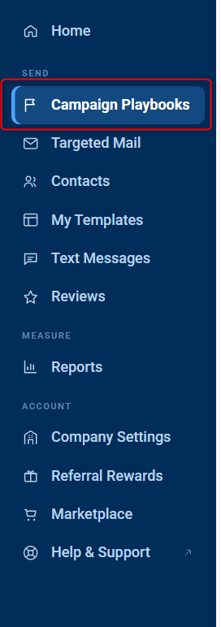
Navigate to your Campaign Playbooks area.
-
Choose to either start with a pre made Campaign or start fresh and create your own. Please reference this Campaign Playbooks article for additional information about building a Campaign.

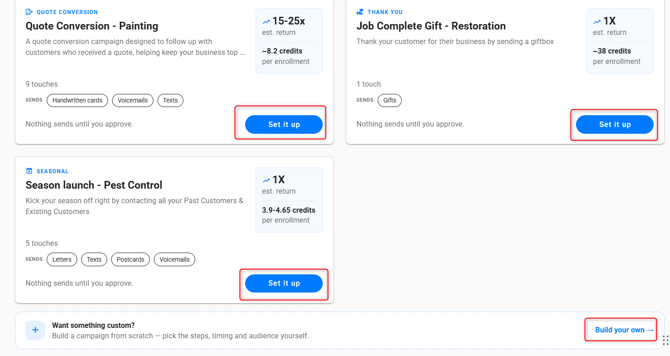
Building Campaign from scratch:
-
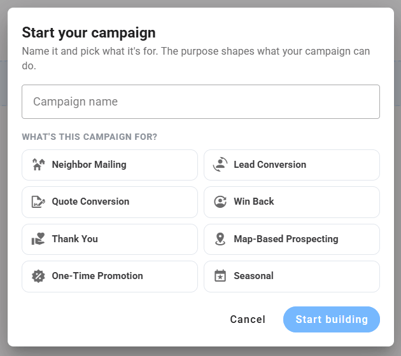
Name your Campaign
- Select what you will use your Campaign for
- Click Start building
-
Along the right side, select + Add Enrollment Trigger
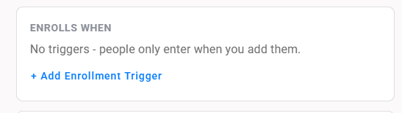
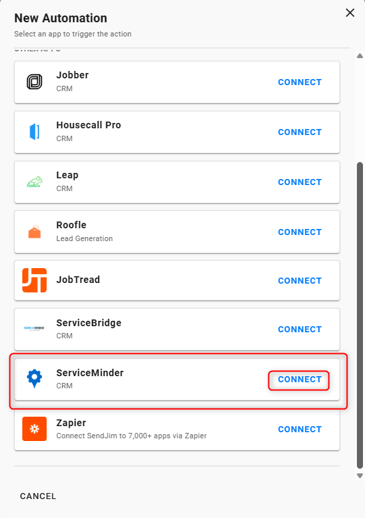
- Once you do, you will see the option to connect ServiceMinder. Click Connect
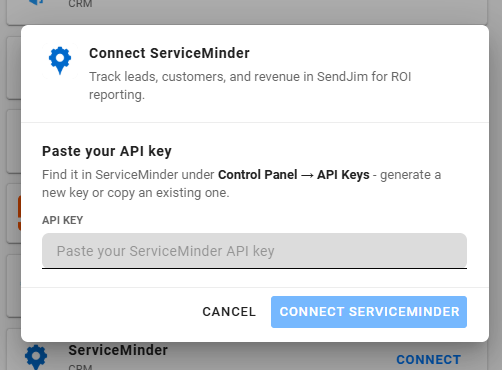
- You will then be prompted to paste your API Key
Step 4: Choose Enrollment Trigger
- Select ServiceMinder
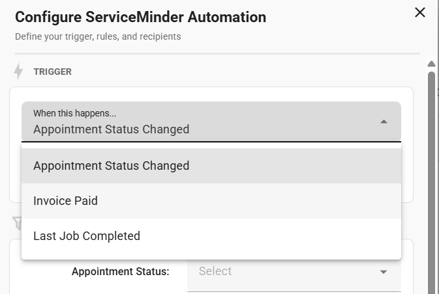
- Select your Tigger from the dropdown
- Appointment Status Changed - Triggered whenever you update an appointment's status
- You'll be asked to select the "Appointment Status" you want to trigger the automation: Scheduled, Started, or Completed
- Invoice Paid - Triggered whenever an invoice status goes to "paid"
- Last Job Completed - Triggered whenever an appointment is marked Completed (the job’s Actual Finish date is set)
- You'll be asked to set the job completed timeframe you'd like the automation to trigger off of, as well as how far back you'd like the automation to look once it's turned on
- Appointment Status Changed - Triggered whenever you update an appointment's status
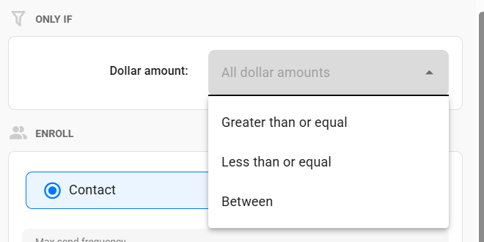
- Select your Dollar Amount if needed (or use "all amounts.")
-
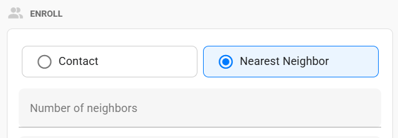
You must then decide who the recipient will be, either the customer or their neighbors. If you choose for it to be sent to their neighbors, you must then select how many neighbors.
-
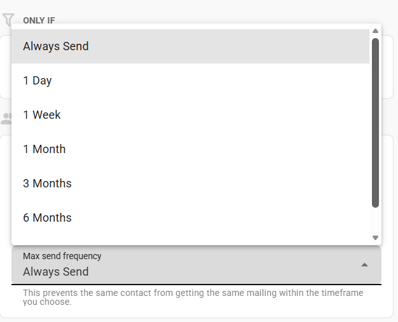
The next step is to choose your Max Send Frequency Per Address. This setting will limit how many times the integration will trigger the same Campaign off the same address. For example, if you have an automation set-up to send a 3-card Campaign to the neighbors after a job is completed, you only want that Campaign to trigger once every 3 months if you service that client multiple times per month. This would prevent the neighbors of your client from receiving multiple of the same mailing.
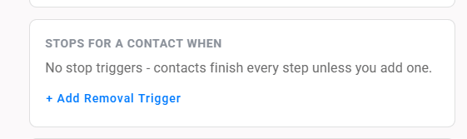
Step 5: Choose Removal Trigger (Removal Triggers are not required but they do allow you to unenroll a contact from a Campaign if a certain criteria is met).
- Along the right side, click + Add Removal Trigger
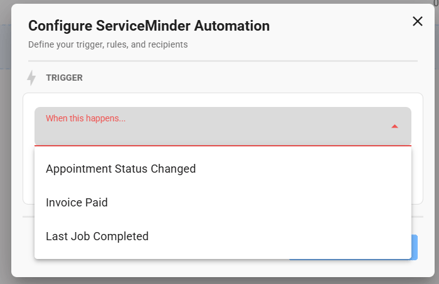
- Select your Trigger
- Appointment Status Changed, Invoice Paid or Last Job Completed
- Select the Dollar Amount if needed.
Step 6: Choose your Templates and Timing
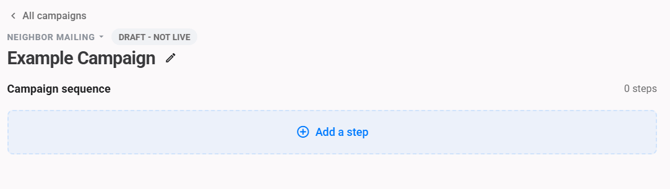
- Along the left side, click + Add Step
-
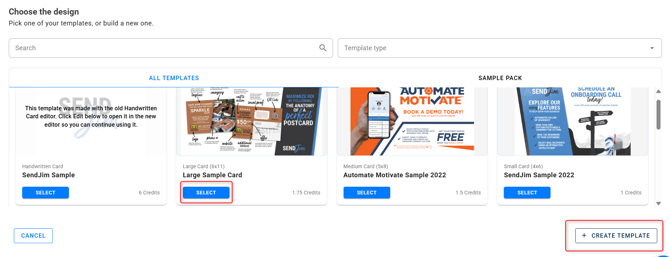
Select a Template you've already created or click Create Template in the lower right corner
-
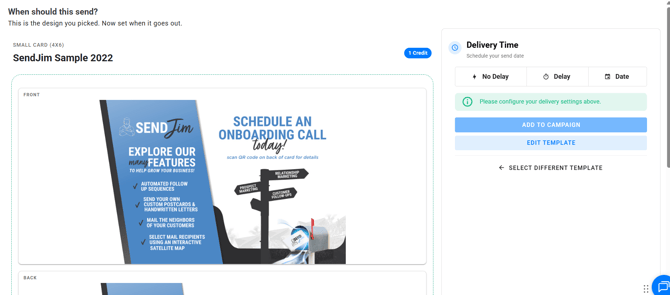
You can review your Template and make any edits needed prior to saving.
- You will also be able to add a delay if needed
-
Click Add to Campaign once your timing is set
Step 7: Save Campaign
- If you plan on sending a multi-step Campaign, select the additional Templates, being sure to adjust the timing.
- Click Save Campaign
**Timing between steps is always based off the previous step**
Step 8: Neighbor Mailing Settings
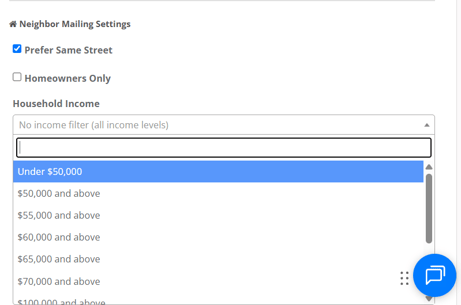
- This is an optional step. You have the ability to add filters if the Trigger you set up is to send to the Neighbors. In your Company Settings are Neighbor Mailing Settings.
-
Prefer Same Street- This filter will try to only mail to neighbors on the same street as the address that triggered it. However, if there are not enough neighbors on the same road, the system will spread out to other streets close by to fulfil the full number of neighbors requested.
-
Homeowner Only- This filter will ensure the Neighbors receiving an item are only Homeowners
-
Household Income- You can ensure any neighbors receiving the mailings meet specific income levels.
Automating SendJim mailings from ServiceMinder
Step 1: Connecting SendJim to ServiceMinder:
-
On the left menu in ServiceMinder, go to Administration > Control Panel
-
Click Integrations, choose "Marketing" at the top, scroll down to "SendJim," and click "Connect"
-
Log in with your SendJim username and password and click "Allow" in the pop-up
If you are already logged into your SendJim account in a different window, you might only see the "Allow" pop-up
You're now ready to set-up your automations!
Step 2: Sending Automated SendJim Mailings from ServiceMinder
Make sure to have a Template or a Campaign saved in your SendJim account before following the steps below.
-
On the left menu in ServiceMinder, go to Administration > Drips
-
At the bottom of the page, click "Triggers"
-
Click "Add" in the upper left of the Triggers chart
-
Name your Drip Trigger and set a description
- Example: "SendJim Neighbor Mailing," "Anytime an Install is Completed, send a Postcard to the 5 closest Neighbors in SendJim"
- Select your Trigger Action from the dropdown
- Set your Filter rules
- Under Action, choose "Send SendJim QuickSend" from the dropdown
- Use the Minimum Value field to specify a minimum dollar amount that the triggered thing needs to be more than to generate the mailing
- Select who you want to send the mailing to
- Contact: Will send your SendJim mailing to the client who triggered the action
- Neighbors: Will send your SendJim mailing to the closet neighbors around your client
- If you chose "Neighbors," type in how many neighbors you'd like to send the mailing to
- If you chose "Contact," you may leave this field blank
- Select your SendJim Mailer or Campaign from the dropdown
- Click "Save" in the lower right of the page
Step 3: Set your Auto-Replenish and Max Spending Limits (Mandatory)
- This is the last and most important step. Navigate to your Company Settings along the left then select the Billing tab. Once in the Billing tab you'll want to turn on your Auto Replenish. There's a toggle button to turn it on easily.
- After that you'll want to go into your Integrations tab and set your Max Monthly Spending.
- These numbers are what SendJim will use to give your CRM a budget to spend every month. Once your CRM has reached your Max Monthly Spending limit inside of SendJim for that calendar month, SendJim will send you an email and stop any additional mailings from being triggered until the next calendar month. Or, you can choose to come in and increase your max spend to allow automation to continue.
Questions? Open a Quick Chat on our website.
Need help setting this integration up? Click Here to Schedule an Appointment with Our Team